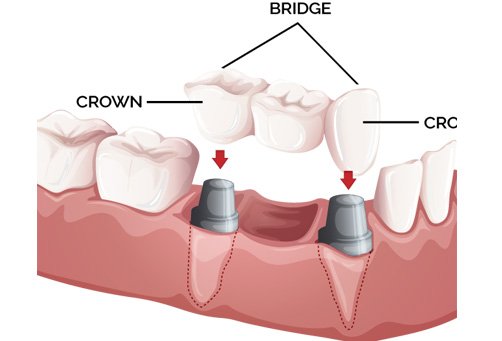
BEST AND MOST ECONOMICAL STEPS FOR CROWN AND BRIDGE PROSTHESIS.
For any FPD, diagnostic impression with putty is most useful and economical
1) It serves as diagnostic impression,
2) Diagnostic Casts made from it,
3) Mock preparations can be done from these casts
4) It can be used for making immediate temporaries
5) Same can be used to make final impression with Light Body
 • You can’t get accurate shade from comparing adjacent tooth
Step Two: Shade Matching• Shade matching should be done before tooth preparation
 • You can’t get accurate shade from comparing adjacent tooth
Step Three: Gross Tooth Preparation Step by step preparation:• Do the occlusal/Incisal preparation first • This will reduce the tooth bulk a lot, gives more clarity of long axis of the tooth • Always do preparation by cutting motion • Do not follow wiping or swiping motion for preparation • Use new burs for preparation. I can’t explain the details of preparation but if you follow my unique technique of crown preparation, your preparation will be highly predictable , conservative and fast. It needs little Hands on Extracted teeth with 2 ,3 preparations only you will get to know how exactly this cutting motion works. Better join our Fixed Prosthetic Session or Clinical Dentistry Fellowship.
Step Four: Temporization• Before going for final impression or gingival retraction • Prepare temporaries first • Lubricate the prepared teeth with petroleum jelly • Cut out excess material from the impression to have smooth re-seating •Prepare vent hole channels along with the cervical margins of the prepared teeth to the outer surface of the impression with a scraper /BP Blade • This will let out the excess material out of the impression without creating any undue pressure • Add temporary resin or acrylic mix into the diagnostic putty impression into the prepared teeth sockets and place it over the teeth • After initial setting when material starts polymerization(increase in the temperature of mix), take out the impression and temporaries • Remove excess material • Finish And polish it • Try these temporaries in patient’s mouth • Check seating and high points
Step Five: Gingival Retraction:• Start gingival retraction with temporaries this will facilitate easy insertion of cord • Remove temporaries • Do final preparation and finishing
Step Six: Final Impression• Now take final impression after few min of cord insertion • Take wash impression with light body, with or without cord, no need to add complete arch, just fill prepared teeth impression sockets and insert in patients mouth • Wait for 3 min and take out the impression Inspect for any voids, bubbles, irregularities
Step Seven: Bite RegistrationTake bite if necessary I will explain in detail About in my next Blog
Step Eight: Cementation of Temporaries:• Lute temporaries with temporary cement • Use noneuzenol cement for all ceramic or zirconia crowns • Use Euzenol cement for metal ceramic crowns
Summary:• Here we used same putty for diagnostics, temporaries and for final impressions also • My sincere request is try using rubber base impressions for FPD’s and give immediate temporaries, may be metal ceramic or all ceramic • Alginates are used for diagnostics not for final impression • Cost may be higher by 200 Rs. But we are getting temporary along with that • We are giving immediate temporaries that’s a great relief for patients. • All together patients perception and your work standards will be improved with this. • Better join with us in the Fixed prosthetic session at Asian Dental Academy Hyderabad or NRDC Dental College Nanded, your complete perception towards Fixed prosthetics will be changed. We started Clinical Dentistry Fellowship where you will be given 10 cases of Endo, 10 cases of FPD’s and 10 cases of Restorative and Extractions. We also cover Laminates and Veneers in this.


No Comments